Starting with Surroundings
Prerequisites:
hauzdEd 1.6.068 or newer
.fbx and .max MAP default file https://downloads.hauzd.com/resources/surroundings.rar
STANDARD UI https://downloads.hauzd.com/gettingstarted/standardui.rar
STANDARD UI https://downloads.hauzd.com/gettingstarted/standardui.rar
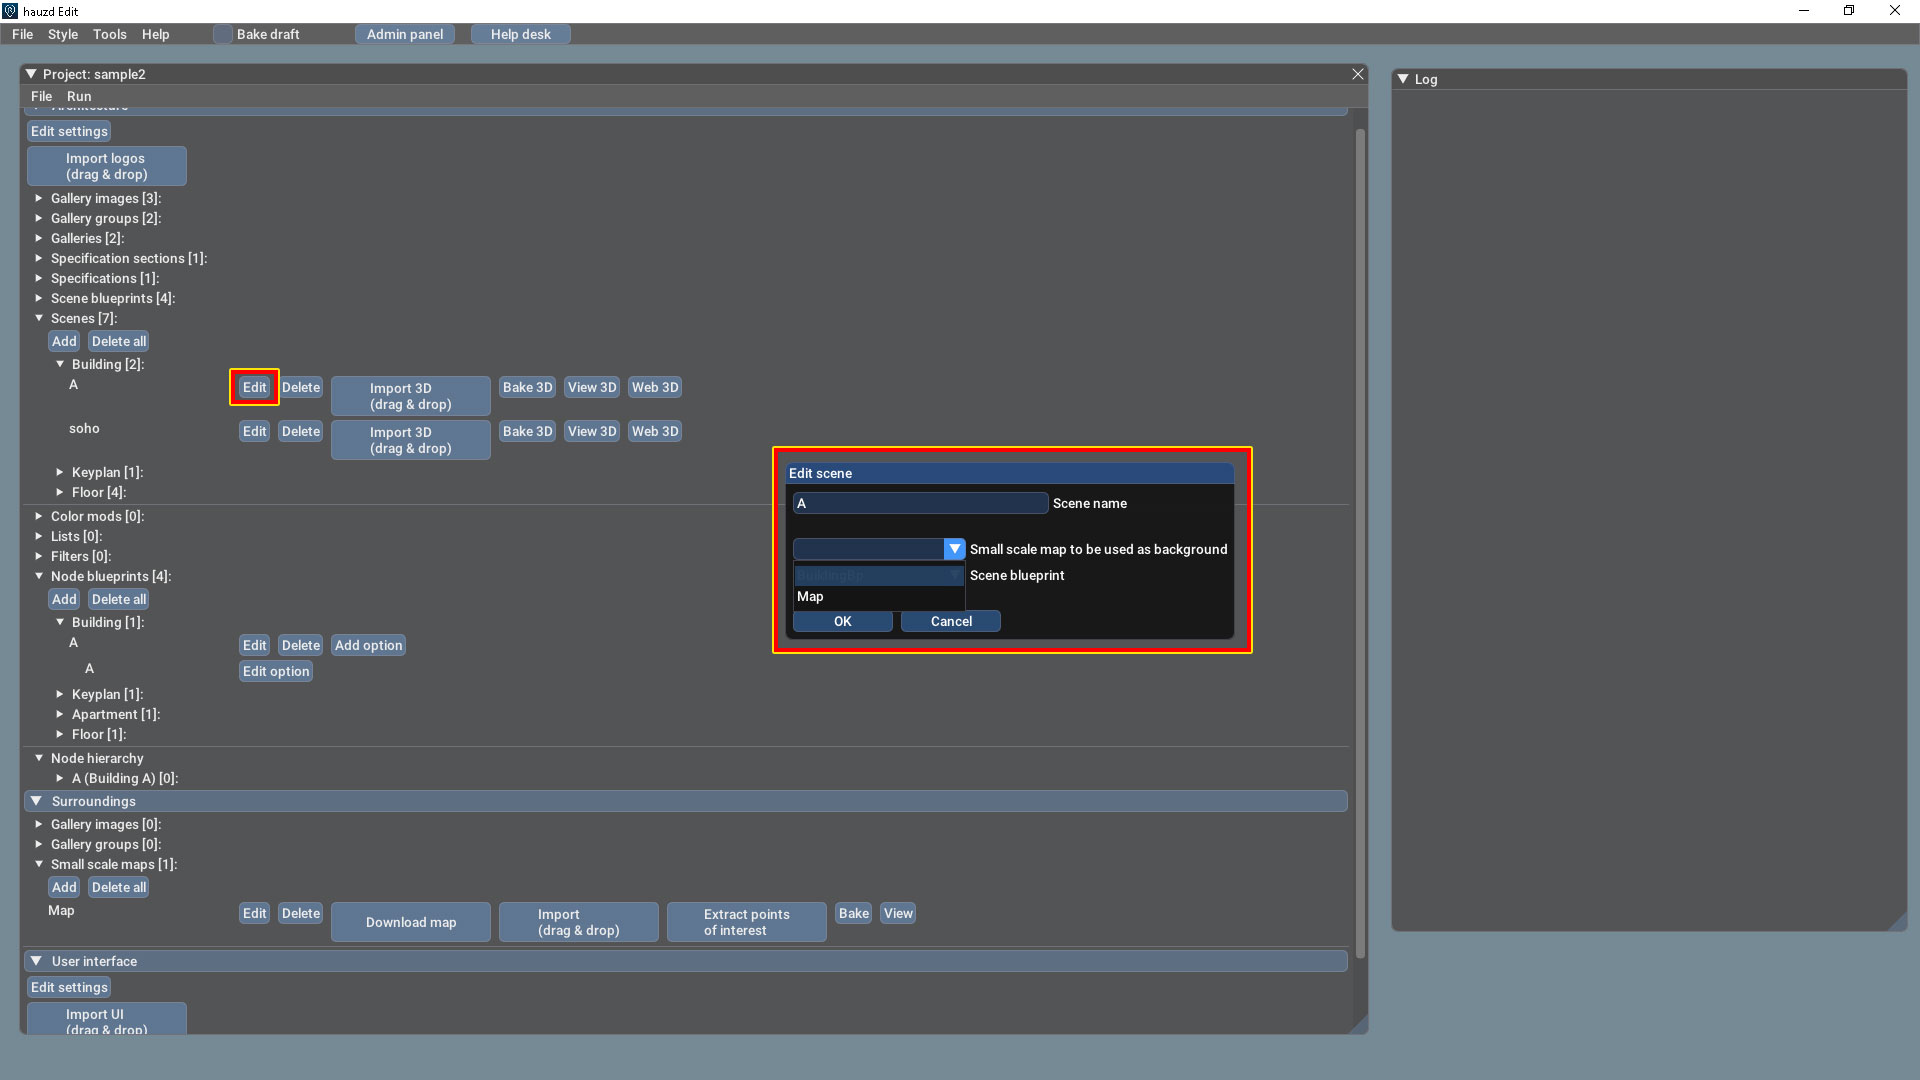
1. In your Surroundings go to Small Scale Maps and click add
2. You will find a similar screen as your sceneBlueprint because basically you´re importing an fbx scene again, this Map Name should be exactly the same as the fbx
3. If you checked Use Latitude/Longitude and Azimuth from Architecture, you will need to go to Edit Settings and put your coordinates there
4. Back to edit the Map Scene, you can start adding your POINTS OF INTERESTS
5. You can add as much as you want, the standard UI will automatically place the icons in place
6. Add the Map as a background to the Exterior Scene

7. And add it to the Node Blueprint as well
7. And add it to the Node Blueprint as well
8. Make sure you have placed your files in the local folder you set for surroundings, you can also drag-and-drop
9. Use the buttons to process your scene, download the map and extract the POIs, Note: "Import" action will also automatically download the Map if it needs to
10. Test!
Add a custom POI:
1. You can create as many custom points interests as you want, the only thing you need to do is, after you´ve created the POI Category, Click on Add
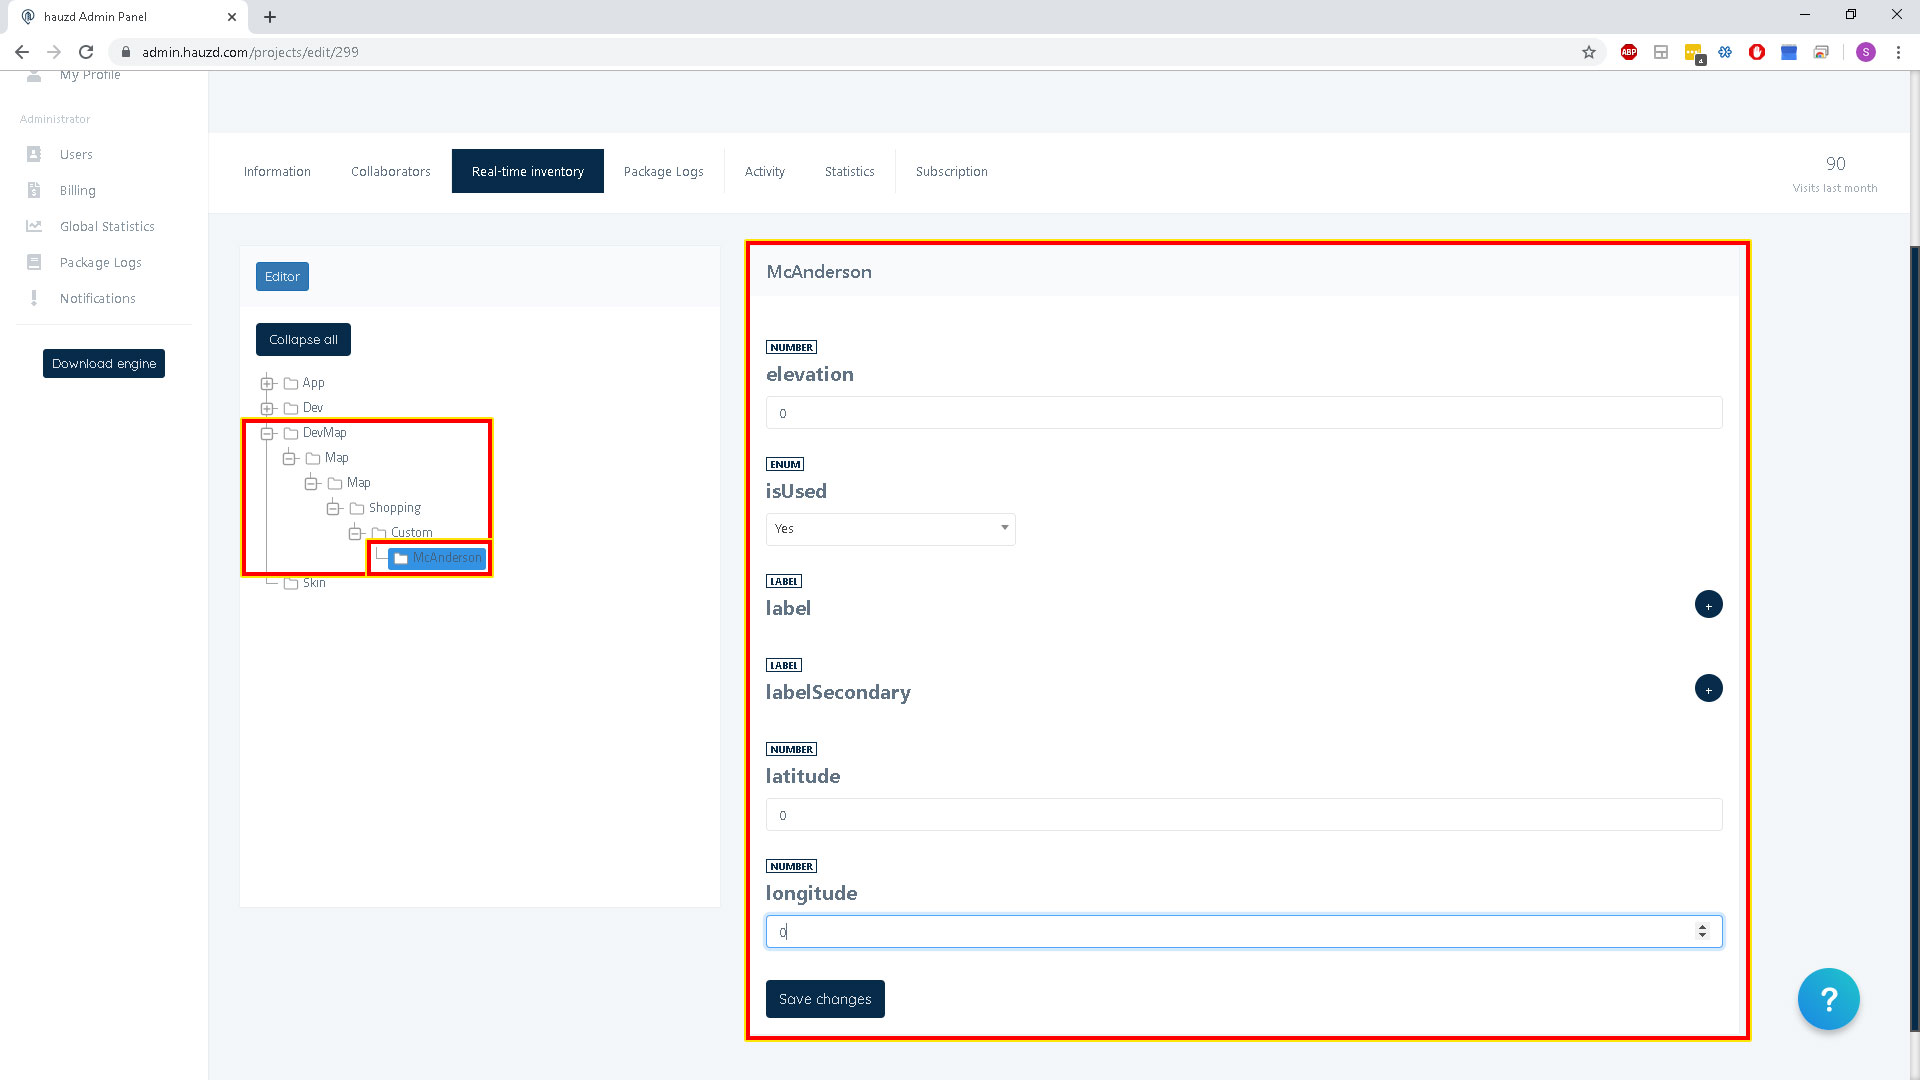
2. After Saving, this information will be uploaded to the admin and you can edit coordinates, elevation, labels...

Admin Management
1. After creating all your Points of Interest and saving, all the extracted and custom Data will be uploaded to the cloud and into our admin panel, go to Real-Time Inventory, under the DevMap Tree should be all your categories, you can edit in table view and manage a large number of POIs in one Screen
UI Elements
1. This is one of the most easy customization work of the UI, everything is inside the layer EXPORT:loc.
if you want to customize it, you just need to change your vector/image information inside the "content" layer and replacing the default icons with yours. Make sure the category matches (i.e.: place your new medical icon in the same place as the old medical icon) this would be the only think you need to do, your icons will be exported using the EXPORT_IMAGE widgets and used as reference in EXPORT_RECT for placement, this icon location information is automatically processed by the engine and the Points of interest you added to your map
if you want to customize it, you just need to change your vector/image information inside the "content" layer and replacing the default icons with yours. Make sure the category matches (i.e.: place your new medical icon in the same place as the old medical icon) this would be the only think you need to do, your icons will be exported using the EXPORT_IMAGE widgets and used as reference in EXPORT_RECT for placement, this icon location information is automatically processed by the engine and the Points of interest you added to your map
Large Scale Map
Similar as we did we the Small Scale Map, we need to add a Map scene and import the fbx

IMPORTANT: THE EXTEND OF THIS LARGE SCALE MAP MUST BE BIGGER THAN THE SMALL SCALE MAP EXTEND
Remember to add it to your nodeBlueprint Scene
After all of this process, you should be able to run your app and monitor your surroundings
Related Articles
Starting with hauzd
Hauzd is the easiest way to create interactive real estate 3D presentations and I'm excited to show you the production pipeline so you can start creating your projects faster and easier than ever!. Once you complete this full set of videos, you´ll ...Importación de imágenes de Dron para uso en entornos
Requisitos: Formato: .hdr Modelo y proporción: 360 Equirectangular (ejemplos CORRECTOS) - NO PANORAMA SIMPLE (ejemplo incorrecto) - NO CUBEMAP (Ejemplo incorrecto) Resolución mínima: 2048x1024 Nivel de toma: Todos los edificios, árboles y estructuras ...V 1.06.069
Changelog Hauzd Engine v1.06.069 Added Points of interest and large Scale Map added ( How to Use ) Feature2 and Feature3 for properties and Filters Rotate Button for Web and Desktop Version ( Download Standard UI ) Zoom in/Out buttons for desktop ...Introduction to Hauzd - Part 1
Hauzd is the easiest way to create interactive real estate 3D presentations and I'm excited to show you the production pipeline so you can start creating your projects faster and easier than ever!. If you don´t have the installer yet, you can ...Hauzd Engine Function Tags and Prefixes
Here you have the complete list of the Hauzd Engine Tags and name prefixes for Objects and Materials, The Engine limits your every name within 3dsMax, material or object, to be a maximum of 15 characters long, however Tags or Prefixes Do Not add to ...